This post may contain affiliate links or sponsored content. That means if you click on my link and buy something, I will earn a small commission from the advertiser at no additional cost to you. For more information, see our disclosure policy.
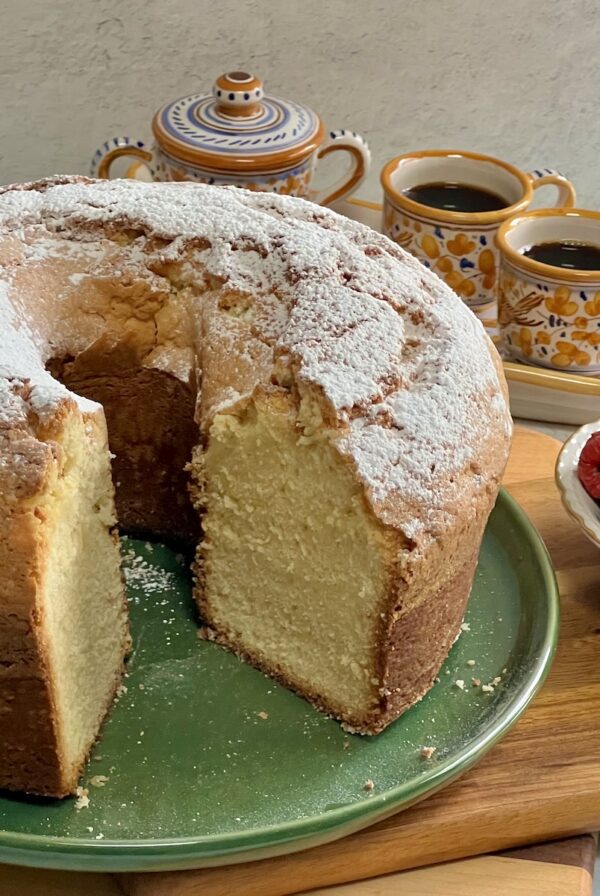
If you’ve never made a Cold Oven Cream Cheese Pound Cake, this is your sign to do so! Perfectly dense-textured but moist and light in flavor, this nostalgic, traditional cake starts out in a cold (not preheated) oven and slowly rises to bakes to perfection. It’s a very easy recipe that can be made with ingredients you likely have on hand. Read on for more!

Pound cake is the perfect humble dessert. Rich and buttery with a nostalgic vanilla flavor, dense texture (in a good way!), a crusty top and tight moist crumb, it’s hearty, no-fuss and requires no decorations. (I included a lemon glaze recipe which is completely optional.)
Named for its original recipe of one pound each of butter, eggs, flour and sugar, this pound cake recipe with cream cheese is a more modern take on the classic. It strikes a lovely balance of tanginess, sweetness and richness. My mom was famous for it! It was a staple at every family event, not to mention usually on hand in our household for paesani that would stop by. This recipe couldn’t be more tested!
Why a Cold Oven?
The unique slant and key to this recipe is that it starts baking in a cold oven (i.e., not preheated), unlike almost everything else that you ever bake. This helps to maintain the cake’s dense characteristic and ensures both a beautiful crusty top and that the outside of the cake doesn’t get too brown while the interior is cooking. (Pound cakes take longer to cook than most other cakes and so are in the oven longer.)
When I was younger, I always wondered why my mom never preheated the oven when making this recipe. She may have not known the science behind why, but she knew it was the right thing to do!
Why Cream Cheese?
Cream cheese not only adds a pleasant tangy flavor to the otherwise rich butter and vanilla flavor, it’s also the difference between dry pound cake and moist pound cake. It lightens and lifts the batter while baking since cream cheese tends to puff as it bakes. It also helps to keep the cake dense (in a good way) but not too heavy.
Adding dairy is actually the secret to a great pound cake, in my humble opinion. I sometimes also make a sour cream pound cake and have even added Greek yogurt and buttermilk to pound cake recipes in the past. The added dairy definitely contributes to a moist cake without weighing down the crumb. Plus, I love the flavor it adds!

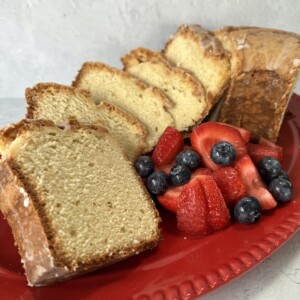
Enjoy this moist and flavorful, old-fashioned, cold cream cheese pound cake with no frills any day of the week. Or dress it up a bit with glaze, berries and whipped cream for an elegant dinner party, holidays or any special occasion. Any way you slice it, it will be a hit. Mangia bene!
Serving Cream Cheese Pound Cake
I love this recipe plain. It’s perfectly sweet and satisfying as is, even without the glaze!
Having said this, it pairs beautifully with mixed berries and ice cream, a nice dollop of whipped cream or jam or a light sprinkling of powdered sugar.
And believe it or not, when we had pound cake leftovers growing up, my sister and I would sometimes toast a slice of it and then spread it with butter. I know–seriously decadent indeed! This works best when the cake is not glazed, fyi.
Although I haven’t done it myself, some people swear by either griddling a slice of this pound cake in a puddle of melted butter, turning it into French toast or cutting it into cubes to make cake croutons to layer with berries and cream. Definitely let me know if you try any of these!

Main Ingredient Notes
Here are the ingredients we’ll need for this pound cake recipe with cream cheese:
- Butter: The base of the cake. Use unsalted butter and be sure that it’s at room temperature. Note that my mom always used margarine for this recipe (it was the 70s/80s), but I always use butter. Softened butter or shortening can be used to grease the cake pan.
- Cream Cheese: Enhances the flavor and texture of the cake. Use full fat, brick-style cream cheese and make sure it’s softened at room temperature.
- Eggs: Eggs are the binder and workhorse in the recipe. They also give the cake density, structure and lift. Use large eggs at room temperature.
- Flour: The base of the batter. I use all purpose flour, but cake flour can also be used.
- Sugar: Use granulated or cane sugar. While 3 cups may seem like a lot of sugar, this is a very large, dense cake and this amount is needed to sweetness and properly cream the butter and cream cheese. (If you reduce the sugar in the recipe, the cake could end up dry.)
- Vanilla Extract: Enhances the flavor of the pound cake and the (optional) cake glaze. You can use almond or lemon extract if you prefer.
- Baking Powder: To help the cake rise. While baking soda is not in the original pound cake recipe (a.k.a., the million dollar pound cake), a small bit here helps the crumb/texture in this recipe.
- Salt: Just a little bit is in the recipe for flavoring and to enhance the other flavors in the cake. If you’re using salted butter, you can skip the salt in the recipe.
- Powdered Sugar, Fresh Lemon Juice: Used to make the (optional) cake glaze. Be sure to use freshly squeezed lemon juice and not the bottled stuff on the grocery shelves, which has an odd flavor in my opinion.

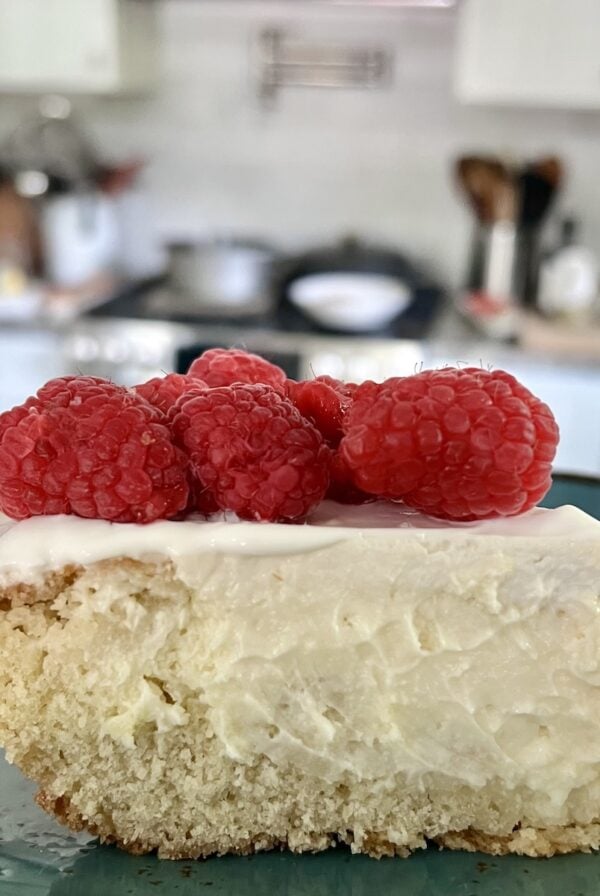
Another one of my mom’s famous recipes that is super-nostalgic and comforting is her Sour Cream Cheesecake recipe–very unique, rich and creamy!
How to Make Cold Oven Cream Cheese Pound Cake
- Set the butter, cream cheese and eggs out on the counter for a few hours to allow them to come to room temperature before getting started. Grease and flour the bottom and sides of a 10” diameter tube cake pan with at least a 16 cup capacity (18 cups is ideal). Set the pan aside.
- Place the softened butter and sugar in the bowl of a stand mixer and beat on high using the paddle attachment until smooth. Scrape the bowl with a spatula, then add the cream cheese and continue to beat on high until light and fluffy. Scrape the bowl again.


- Then, turn the mixer on low and add the eggs one at a time, whipping each into the batter until combined. Then add the vanilla extract and mix until it’s fully incorporated. Use a spatula to scrape down the sides as needed.
- Finally, add the flour mixture, 1 cup at a time, ensuring that each cup is mixed in before adding the next. Once all the ingredients are in the mixing bowl, continue to beat on low for 20 minutes. Use a spatula to scrape down the sides a few times during this process.


- After 20 minutes, the batter should be very light and fluffy! Carefully scoop or pour it into the prepped cake pan and use a spatula to smooth out the top.
- Then, poke a few “air holes” into the batter with the spatula.


- Transfer the cake pan to a rack in the middle of a COLD OVEN (i.e., not preheated). Turn the heat on to 325°F and bake for 1 hour 15 minutes. Then check the cake’s doneness with a cake tester, thin skewer or thin knife inserted into the center of the cake. If it comes out clean with no streaks of batter (a few small crumbs are ok), then the cake is done. If there’s clinging batter, continue to bake, testing every 10 minutes or so.
- PRO-TIP: Every oven is different, so it’s best to check after 1 hour 15 minutes, but it will likely need more time.
- Once the cake is done baking, turn the heat off, but keep the cake in the oven for 5 more minutes with the oven door propped open. Then, remove the cake from the oven and let it cool. If you have a wire rack, place the pan on it.
- Once the outside of the cake pan is cool enough to touch (20 minutes or so), run a thin knife around the perimeter of the cake, in between the cake and the pan, to loosen it. See details in recipe about releasing the cake from the pan.
- PRO-TIP: Don’t wait too long to turn the cake out. If the cake is left in the pan too long, condensation may form, potentially causing the cake to steam in the pan and stick, which would not be good.


- If you are including the lemon glaze, place the powdered sugar, lemon juice and vanilla extract in a shallow bowl and mix with a fork or small whisk until there are no clumps and the mixture has the consistency of a glaze.
- PRO-TIP: If it’s too thin, add more powdered sugar. If it’s too thick, add more lemon juice.


- Be sure the cake is completely cooled, then, pour or drizzle the glaze on the cake. Once the glaze has set/hardened, the cake can be served. Enjoy!
- PRO-TIP: The glaze will harden fairly quickly, so it’s best to make the glaze and then glaze the cake immediately afterwards.


Frequently Asked Questions
Not preheating the oven and starting to bake this cream cheese pound cake in a cold oven achieves three things: (1) helps to maintain the dense characteristic of the pound cake; (2) ensures a beautiful crusty top; and (2) ensures that the outside of the cake doesn’t get too brown while the interior is cooking. (Pound cakes take longer to cook than most other cakes and so are in the oven longer.)
This step helps to ensure that the pound cake will not fall. I ran a test to verify this.
Well, no, they don’t actually need the cream cheese. But, in addition to the cream cheese adding a pleasant tangy flavor to the cake, it helps to keep the cake moist and dense (in a good way).
Adding dairy is actually the secret to a great pound cake, in my humble opinion. I sometimes also make a sour cream pound cake and have even added Greek yogurt and buttermilk to pound cake recipes in the past. The added dairy definitely contributes to a moist cake without weighing down the crumb. Plus, I love the flavor they add!
I (and my mother) have always used all-purpose flour for this recipe, but “cake flour” can also be used successfully. Some say that cake flour rises better and has a more tender crumb. Cake flour should generally be sifted before measuring.
DO NOT use self-rising flour for this recipe. The leavening agents in it will cause the pound cake to rise too much and spill out of your pan, creating a mess. Pound cakes are meant to be dense and only rise minimally as compared to other types of cakes.

What Could Go Wrong …
The most common reason for this or any type of pound cake falling is if you open the oven door too often while the cake is baking or take it out of the oven before it is fully baked (thereby exposing it to cold air before it was baked through).
Leaving the pound cake in the oven for five minutes after it’s done with the door propped open and temperature off helps to ensure that the pound cake will not fall.
NO! Pound cakes are large, dense cakes that take some time to bake properly. Patience is definitely a virtue when baking a good cream cheese pound cake! Plus, starting with a cold oven does increase the overall time in the oven.
This cake is baked at 325°F, and I would not go higher than that. You can go lower to, say, 300°F. A lower temperature will likely create a paler, fluffier cake.
However, 325°F is the perfect temperature for this recipe. The actual baking time will vary based on your oven. It takes 1 hour 40 minutes in my electric oven but took less time in my previous gas ovens.
Reducing the sugar, baking the cake for too long, using too much flour or cooking in a hotter oven than called for in the recipe can all dry out your pound cake (or ANY cake!). Be sure to use the exact amount of ingredients as indicated in the recipe below.
Not at all. My cold oven cream cheese pound cake always has a cracked top! It’s sign of a good rise and a normal characteristic of a well-baked pound cake. Due to the dense batter of the pound cake, it naturally tends to crack on top as the center expands and pushed through the crust during baking.
In fact, a crackless pound cake might indicate it’s too dense or didn’t rise enough.

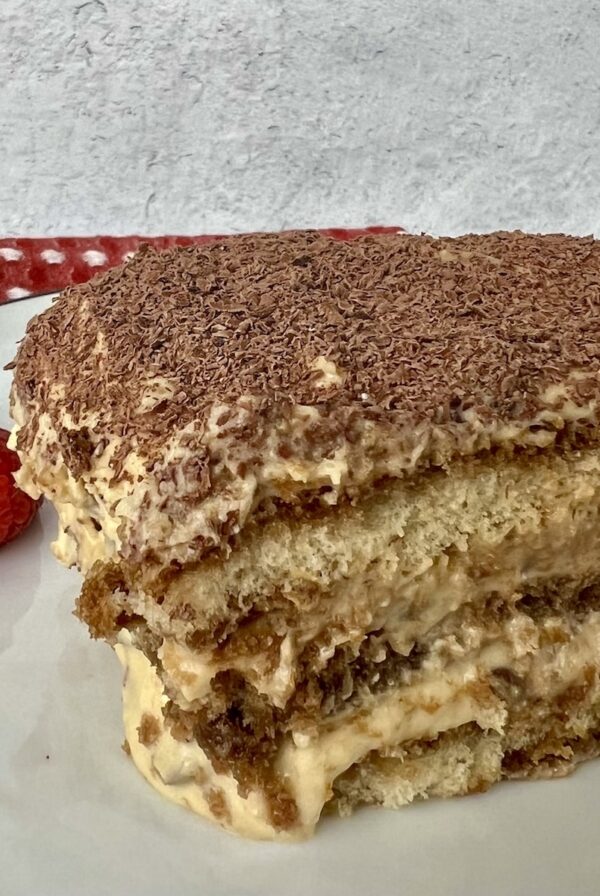
Love sweets? Check out Authentic Italian Tiramisu, Sicilian Ricotta Cheesecake and also some of my cookie recipes: Anginetti Cookies, Anise Pizzelles, Czechoslovakian Bar Cookies, Buttery Snowball Cookies and Chocolate Chip Peanut Butter Cup Cookies.
Best Pan for Making this Pound Cake
The best cake pan to use for this recipe is a 10” diameter tub cake pan with an 18 cup capacity (although a 16 cup capacity will work). The pan I use is also nonstick making it easier to flip the cake out of the pan. I like the straight-sided tube pans as that’s what I grew up with. This type of pan is often referred to as an angel food cake pan.
You can use a bundt pan with a decorative finish as well. But as they tend to be smaller, you will have extra batter left over. Fill the bundt pan about ¾ of the way.
You can also make this cake in mini/individual cake pans or a loaf pan. You’ll need 2-9”x5” loaf pans for this recipe. Note that the cook time will vary if you make this recipe in these smaller pans.
Recipe Variations
Truth be told, I don’t really mess with this recipe. But, if you have the itch to try something different with it, here are a few ideas:
- Try a different extract, such as almond or lemon. The same goes for the glaze.
- For extra vanilla flavor, scrape a vanilla bean into the batter.
- For citrus flavor, fold in some lemon or orange zest.
- Add some chunkiness by folding in some chocolate chips, chopped nuts or dried fruits.
- Avoid mixing in any ingredients that would add more moisture, such as fresh fruit.

Storing and Freezing Pound Cake
Store the cream cheese pound cake at room temperature for 3 to 5 days. Be sure it’s fully cooled, then cover it well in plastic wrap or keep it in an airtight container so that it doesn’t dry out or become stale. If there is still cake left after 5 days, then transfer it to the refrigerator where it can stay another few days.
Pound cake freezes beautifully for up to 3 months! To freeze it, wrap the (cooled) cake tightly in 2 to 3 layers plastic wrap then a layer of foil and/or place it in a freezer bag. You can also wrap and freeze individual slices, or just put parchment paper in between slices and wrap as if a whole cake. Unwrap and thaw completely at room temperature before serving.
TOP TIPS FOR COLD OVEN CREAM CHEESE POUND CAKE
- Follow the recipe exactly for best results.
- Cold Oven: DO NOT PREHEAT THE OVEN! Placing the cake in a cold oven is the essence of this recipe. I realize that it may not feel right but trust me on this. The oven must be cold/not preheated.
- Grease and Flour the pan properly! Otherwise, you will have a real hard time getting the cake out of the pan! (See details in recipe below.)
- Room Temperature: Be sure that the butter, cream cheese and eggs are all at room temperature. Set them out on the counter for several hours before you plan to start the recipe. Room temperature ingredients blend together better than cold ingredients and result in the smooth, velvety batter we want here to make a finished cake with the best texture.
- Cake Only in Oven: To ensure that the heat of the oven circulates properly around the cake, don’t bake anything else in oven at the same time as the cake.
- Turning Out the Cake: Don’t wait too long to remove the cake from the pan. If the cake is left in the pan too long, condensation may form, potentially causing the cake to steam in the pan and stick, which would not be good. Once the outside of the cake pan is cool enough to touch (20 minutes or so), you should turn it out.
- Glazing: Be sure that the cake is completely cooled before adding the glaze. If the cake is still warm, the glaze will probably soak into the cake.
I hope that you are enjoying Mangia With Michele and all of my Italian recipes!
If you’ve tried this Cold Oven Cream Cheese Pound Cake or another recipe here, please let me know in the comments below. I love hearing from you!
FOLLOW ME on FACEBOOK and INSTAGRAM to see more delicious food and what might be going on behind the scenes!
Mom’s Cold Oven Cream Cheese Pound Cake
Video
Equipment
- Tube Cake Pan (10” diameter, at least16 cup capacity/18 cups is preferred)
Ingredients
- 3 sticks unsalted butter, at room temperature (1.5 cups/.75 pound) + more to grease pan
- 3 cups sugar
- 8 ounces full-fat, brick style cream cheese , at room temperature
- 6 large eggs, at room temperature
- 1 Tbsp vanilla extract
- 3 level cups all-purpose flour , (no need to sift) + more for to flour pan
- 2 tsp baking powder
- ½ tsp salt
For the Lemon Glaze (optional):
- About 1½ cups powdered sugar
- About 4 Tbsp fresh lemon juice
- 1 tsp vanilla extract
Instructions
- Set the butter, cream cheese and eggs out on the counter for a few hours to allow them to come to room temperature before getting started. Place a rack in the middle of the oven and remove any racks above it. Combine the flour, baking powder and salt in a bowl and set it aside.(Please see the section above in the blog post for Step-By-Step instructions with photos.)3 level cups all-purpose flour , 2 tsp baking powder, ½ tsp salt
- Grease (with butter or shortening) and flour the bottom and sides of a 10” diameter tube cake pan with at least a 16 cup capacity (18 cups is ideal).This means to rub the bottom and sides with softened butter using your fingers or a wad of wax paper, making sure to coat every crevice, including the corners and seams where the edges meet the bottom. Wipe off the excess with a paper towel. Then add some flour and lightly swirl it around in the pan (rotate the pan) so that the bottom and sides gets a light dusting and are entirely coated. Turn the pan upside down and tap it gently to remove and discard any extra flour, rotating the pan as you tap. (See photo above.)Set the pan aside.
- Place the softened butter and sugar in the bowl of a stand mixer and beat on high using the paddle attachment until smooth.3 sticks unsalted butter, 3 cups sugar
- Scrape the bowl with a spatula, then add the cream cheese and continue to beat on high until light and fluffy. Scrape the bowl again.8 ounces full-fat, brick style cream cheese
- Then, turn the mixer on low and add the eggs one at a time, whipping each into the batter until combined. Then add the vanilla extract and mix until it’s fully incorporated. Use a spatula to scrape down the sides as needed.6 large eggs, 1 Tbsp vanilla extract
- Finally, add the flour mixture, 1 cup at a time, ensuring that each cup is mixed in before adding the next.
- Once all the ingredients are in the mixing bowl, continue to beat on low for 20 minutes. Use a spatula to scrape down the sides a few times during this process.*While 20 minutes may seem excessive, this is the recipe that my mom and I have made hundreds, if not thousands, of time in total. It works!
- After 20 minutes, the batter should be very light and fluffy! Carefully scoop or pour it into the prepped cake pan and use a spatula to smooth out the top. Then, poke a few “air holes”into the batter with the spatula.
- Transfer the cake pan to a rack in the middle of a COLD OVEN (i.e., not preheated). Turn the heat on to 325℉ and bake for 1 hour 15 minutes. Then check the cake’s doneness with a cake tester, thin skewer or thin knife inserted into the center of the cake. If it comes out clean with no streaks of batter (a few small crumbs are ok), then the cake is done. If there’s clinging batter, continue to bake, testing every 10 minutes or so.(Every oven is different, so it’s best to check after 1 hour 15 minutes, but it will likely need more time. The cake took 1 hour 40 minutes in my (electric) oven but used to take less time in my previous gas oven.)
- Once the cake is done baking, turn the heat off, but keep the cake in the oven for 5 more minutes with the oven door propped open. Then, remove the cake from the oven and let it cool. If you have a wire rack, place the pan on it.
- Once the outside of the cake pan is cool enough to touch (20 minutes or so), run a thin knife around the perimeter of the cake, in between the cake and the pan, to loosen it.NOTE: Don’t wait too long to turn the cake out. A too-hot cake is too delicate to be removed from the cake pan. But if the cake is left in the pan too long, condensation may form, potentially causing the cake to steam in the pan and stick, which would not be good.
- Grab a dinner plate (or any plate large enough to hold the cake), place it over the cake upside down. Then, grab hold of the plate and cake pan, take a breath and say a prayer and turn the cake over. If the pan was greased and floured properly, the cake should easily come out! Turn the cake back over and voilà! Now, let the cake finish cooling completely (on a wire rack if you have one).
- If you plan on glazing the cake, then make the lemon glaze next. Place the powdered sugar, lemon juice and vanilla extract in a shallow bowl and mix with a fork or small whisk until there are no clumps and the mixture has the consistency of a glaze.(If it’s too thin, add more powdered sugar. If it’s too thick, add more lemon juice.)About 1½ cups powdered sugar, About 4 Tbsp fresh lemon juice, 1 tsp vanilla extract
- Be sure the cake is completely cooled, then, pour or drizzle the glaze on the cake. (Note that the glaze will harden fairly quickly, so it’s best to make the glaze and then glaze the cake immediately afterwards.) Glazing a cake can be a little messy, but just try to have fun with it. Some glaze will likely end up puddled on the plate. You can scoop it up and re-drizzle it over the cake before it hardens if you want.
- Once the glaze has set/hardened, the cake can be served. If you’ve decided not to make the glaze, you can simple sprinkle some powdered sugar over the cake. Or leave it au naturel! Buon Appetito!
Notes
- DO NOT PREHEAT THE OVEN! Placing the cake in a cold oven is the essence of this recipe. I realize that it may not feel right, but trust me on this.
- Be sure that the butter, cream cheese and eggs are all at room temperature. Set them out on the counter for several hours before you plan to get stated. The butter and cream cheese should be softened and easy to mix. Room temperature ingredients blend together better than cold ingredients and result in the smooth, velvety batter we want here to make a finished cake with the best texture.
- You can use either softened butter or shortening to grease the cake pan. My mom always used shortening and I use butter.
- If you’re using salted butter, you can skip the salt in the recipe.
- The best cake pan to use for this recipe is a 10” diameter tub cake pan with an 18 cup capacity (although a 16 cup capacity will work).
- You can use a bundt pan with a decorative finish as well, but as they tend to be smaller, you will have extra batter left over. Fill the bundt pan about ¾ of the way.
- You can also make this cake in mini/individual cake pans or a loaf pan. You’ll need 2-9”x5” loaf pans for this recipe. Note that the cook time will vary if you make this recipe in these smaller pans.
- To ensure that the heat of the oven circulates properly around the cake, don’t bake anything else in oven at the same time as the cake.
- Making the glaze is not an exact science. Taste test it and, if you like it, go with it!
- Be sure that the cake is completely cooled before adding the glaze. If the cake is still warm, the glaze will probably soak into the cake.
- If you prefer a thick glaze that will sit well and stay on the top of the cake, male the glaze extra thick with more powdered sugar and less liquid.

love soup?
Get My Cookbook!
Ditch the dish and embrace the bowl with Soupified: Soups Inspired by Your Favorite Dishes!
Available in ebook, paperback and hardcover.
I’ve made dozens of pound cakes over the last few decades and this is now my favorite!! I don’t know if it the cooking method or the 20 minutes of beating but it was so moist and the texture was PERFECT! Thanks for sharing!
I’m SO happy that you loved this pound cake recipe, Jill! My mom would have been honored to hear this. Thanks so much for your comment. 🙂
Would love to try this but I don’t have a stand mixer. Would it be difficult to use a hand mixer?
Hi Debbie, Give it a go with the hand mixer. It should work fine, but will just be a bit more difficult. (Note that I have not made this cake with a hand mixer.) The final 20 minutes of beating will not rally be possible with the hand mixer, so just do what you can. Please let me know how it goes.
I made this cake recently. OMG!! Your recipe is PERFECT!!!! I followed it exactly. Your directions and steps are easy to follow! My family loved it. You’re the best! Thank you for all you share😍
It’s my pleasure, Josephine, and I am incredibly happy that you love this pound cake recipe. I love it too! Thank you so much for your comment. 🙂
This is the first and only pound cake recipe I’ve ever made . I love it and it’s my oldest 3 grandchildren’s favorite cake. I love it